I must ashamedly admit that until our awesome weekend out to Copeton Dam I’d never cooked a camp oven roast before!
Seeing as we were heading out there for a couple of days with some wonderful friends we thought what better time to take along a leg of pork that we’d been saving in the freezer. (Living on a farm, this was our first and only pig we’d raised ourselves as food and oh boy is it tasty!)
We got the men to stoke up the main campfire before they headed fishing for the afternoon, ready for our attempt at a scrumptious campfire roast! (I’ll apologise now for the lack of photos!)
PREPARING THE MEAT:
Firstly, pork isn’t generally the kind of meat you’d cook in a camp oven, but we’re all for using what you’ve got and giving anything a go (almost!) while you’re camping so we thought we’d give it a try anyway.
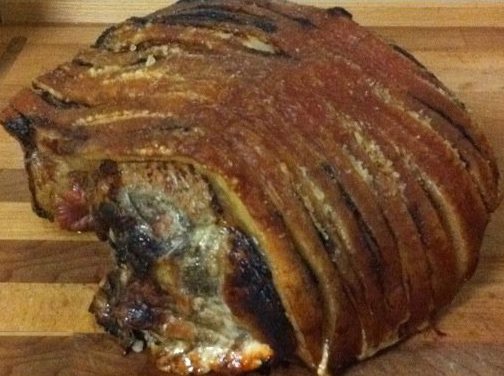
For this roast, we used oil and salt rub to prepare the meat in an attempt to get some crackling. The chances of great crackling in a camp oven aren’t the best but we were keen to try!
For cuts such as beef and lamb, or even chicken, I’d suggest a light oiling, or just a quick spray with some spray oil if you have some.
PREPARING THE VEGETABLES:
We used carrot, pumpkin and washed potatoes with skin on and were feeding 4 adults and 5 children ranging in age from 1 – 8 yrs. The amount of veggies you cook and the type (what we used is recommended as well as things such as sweet potato etc – veggies that don’t go to soggy and roast well) will depend on the number of people you’re cooking for and the size of your camp oven.
Simply wash and/or peel as usual and cut the veggies into a medium size – too small and they may burn & dry out or go to mush, and too large and you might have troubles getting them to cook through.
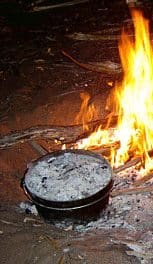
PREPARING THE FIRE
You need to make sure that you don’t sit your camp oven right on top of a roaring fire. It needs to be close enough to the fire to keep the cooking momentum going, but not so close as to burn. We placed ours maybe about half a metre away and shovelled some coals and made a nice flat hot coal area for the camp oven to sit on. Once we placed our meat inside we shovelled hot coals on top and every once in a while when it looked as though the heat was disappearing, we’d scoop some fresh coals both under and on top of the camp oven.
HOW TO COOK YOUR ROAST:
Firstly we put on our roast by itself. The meat will take a while longer than the veggies depending on the size, but ours was quite large, so it was on for a good hour – hour and a half before we put our veggies in. It’s important not to keep opening the lid, this is especially note worthy if you’ve put coals on top as the last thing you want is to be eating ash and coals with your dinner! After about an hour and a half, we threw all our veggies in on top of the yummy looking roast, put fresh coals under and on top of the camp fire and left it cooking for another hour and a half or so. I don’t know the exact time because we were busy sitting by the fire drinking beer bathing the kids and all those important things.
THE RESULTS:
Were super, dooper YUMMO! Between the 9 of us we polished off the entire roast and all the veggies! Super proud of my first ever camp oven roast. The only downside was that the wind was SO FREEZING that by the time we plated up everyone’s dinner and sat down to eat it, which didn’t really take us too long at all, everyone’s food was as cold as it would feel if you’d just pulled it out of the freezer! But cold or not it was yummy all the same. So if I can pull it off with no camp oven cooking experience, don’t be scared, just give it a go, it will be worth it!
I’ll be updating the site soon with an official guide to camp roast cooking which will have a little more specific instructions compared to my inexact advice – so stay tuned!